This no-bake 2-ingredient peanut butter fudge is quick and easy to make with frosting and peanut butter. You only need one bowl and a microwave! Each bite of fudge is rich with peanut butter flavor, perfectly sweet, and makes a delicious no-cook treat for holiday parties and events. Sprinkle sea salt on top for the perfect touch!

Making peanut butter fudge at home doesn't get easier than this 2-ingredient no-cook recipe. It is made without confectioners sugar and condensed milk; all you need is a jar of creamy peanut butter and vanilla frosting! It is naturally gluten-free, dairy-free, and vegan when you choose the right frosting.
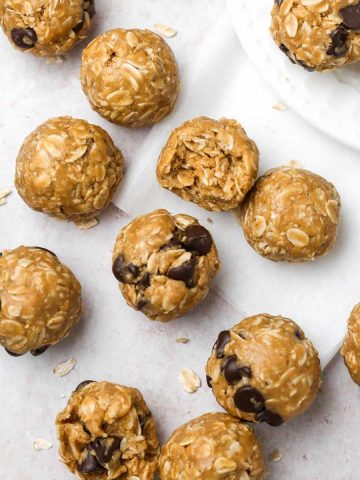
If you love all things peanut butter, you have to try these 2-ingredient peanut butter cookies, these 3-ingredient peanut butter blossoms, and these no-bake peanut butter oat balls next! No matter what you make, your guests will be impressed.
Jump to:
Why You'll Love This No-Bake Fudge
- You only need 2 ingredients to make this no-bake fudge at home.
- Easily freeze the fudge for later and share it at holiday parties.
- No need for confectioners sugar or condensed milk, all you need is a jar of peanut butter and frosting to make this fudge in the microwave.
- Every bite is rich and flavorful without being too sweet. It is the perfect treat for all peanut butter lovers!
- The fudge is naturally gluten-free and vegan with the right frosting, so everyone can enjoy it no matter their dietary preference.
Ingredients
You'll have this fudge ready to enjoy in no time with only 2 ingredients. Below are helpful ingredient notes. Remember to see the recipe card at the bottom for all ingredient information.

- Creamy peanut butter - Stay away from all-natural peanut butter for this recipe; it is too thin to set up properly as fudge. Choose a creamy peanut butter with salt in the ingredients list so the fudge isn't too sweet. You need a 16-ounce jar.
- Vanilla frosting - Choose a high-quality frosting, not the budget store brands for the best flavor. Stay away from whipped frostings and choose creamy instead. Duncan Hines Creamy Vanilla frosting is vegan and gluten-free friendly.
- Sea salt (optional) - If you like a sweet-and-salty fudge, add some flaky sea salt on top before chilling. This is optional and depends on your preference. I make it without the added salt and enjoy the flavor, but it may be too sweet for some.
Step-by-Step Instructions
Instead of cooking the fudge on the stove, use a microwave to soften the peanut butter and frosting. Here are step-by-step instructions for how to make no-bake peanut butter fudge with 2 ingredients.

STEP 1: Add the creamy peanut butter to a microwave-safe bowl and heat it in the microwave in 15-second increments until smooth and easy to stir. This usually takes 30-60 seconds total.

STEP 2: Use a rubber spatula to mix in the vanilla frosting. Heat it in the microwave for an additional 15-30 seconds as necessary to combine.

STEP 3: Mix the fudge until thick and evenly combined. It should hold its shape but will be soft and malleable in the bowl.

STEP 4: Transfer the thickened peanut butter fudge to an 8x8-inch baking pan lined with parchment paper. Use a spatula or your hands to smooth the fudge into the corners evenly.
STEP 5: If desired, add flaky sea salt to the top of the fudge. Place the fudge in the fridge for at least 2 hours to set up and become solid. To remove the fudge, run a knife around the edges of the fudge and lift the parchment paper out.
STEP 6: Slice the fudge into bite-sized squares and enjoy immediately. It is easier to slice after it sits for 10 minutes at room temperature. Store leftover no-bake peanut butter fudge in an airtight container in the fridge so it stays fresh.
TIP: For thinner fudge, you can use an 8x13-inch baking pan instead.

Expert Fudge Making Tips
- Sprinkle flaky sea salt on top of the fudge for a delicious sweet-and-salty flavor.
- Watch the microwave time while you heat the peanut butter. It can go from softened to burnt very easily, so don't melt it longer than 15-30 second intervals!
- Use salted creamy peanut butter for the best taste. Crunchy peanut butter will be too hard to mix and all-natural peanut butter does not have as much flavor.
- If your frosting is a thin and runny consistency, don't melt it with the peanut butter. Fold it into the softened peanut butter with a spatula so the fudge isn't too soft.
- Don't use whipped frosting. It is too soft and doesn't set up properly with the peanut butter. Creamy canned frosting is best, like Betty Crocker, Duncan Hines, or Pillsbury.

Easy Fudge Recipe Variations
If you want to get creative, add some extra flavor, or serve the fudge at a festive holiday party, here are some easy ways to customize the fudge to your liking!
- With chocolate chips - Fold in mini chocolate chips to make chocolate peanut butter fudge. Make it with white chocolate for a sweeter taste!
- Round fudge balls - Make no-bake-peanut butter fudge balls instead of traditional fudge squares by using a cookie scoop to form balls of fudge. Chill them on a baking sheet instead of in a square pan.
- With sweetened condensed milk - Instead of frosting, use 1 cup of sweetened condensed milk and heat it in the microwave with the peanut butter until smooth.
- With cream cheese - Use a jar of cream cheese frosting for a sweet and decadent peanut butter fudge. This adds a slightly tangy flavor!
- Add sprinkles - For festive holiday fudge, press your favorite sprinkles into the top of the fudge before chilling.
These easy no-bake cookie dough bites are another no-cook party favorite to share! For a fall favorite, check out these no-bake pumpkin protein balls.

Frequently Asked Questions
Yes! This no-cook peanut butter fudge is easy to freeze. Place leftover fudge in a shallow airtight container lined with parchment paper and keep in the freezer for up to 6 months. Let it thaw at room temperature before serving.
This no-bake fudge should harden easily in the fridge. If it is not hardening after 2-3 hours, you may not have combined the peanut butter and frosting evenly. Heating the peanut butter and frosting in the microwave in 30 second intervals allows it to combine more easily and harden properly.
For the best-tasting fudge, use salted peanut butter and a high-quality vanilla frosting. Heat it in the microwave so it combines evenly. Smooth the top of the fudge in the pan to create a nice finish and chill it in the fridge to create the best fudge texture.
Homemade fudge takes 2-3 hours to set in the fridge. This allows the peanut butter to harden and become the right texture. You can chill it longer if you prefer.

Storing & Freezing
Store leftover peanut butter fudge in an airtight container in the refrigerator. It will keep well for 3 to 4 weeks. It is perfect to pull out for events and holiday gatherings! Don't leave it out at room temperature for long or it will not last.
To freeze the fudge, place leftover fudge squares in a shallow airtight container lined with parchment paper. Store in the freezer for up to 6 months. Thaw the fudge at room temperature before enjoying it again.
More 2-Ingredient Peanut Butter Recipes


Did you make this 2-ingredient no bake peanut butter fudge with frosting? Please leave a star rating and review below. This supports my blog and helps other readers! Share your homemade PB fudge on Instagram or TikTok and remember to tag me. To stay updated with new recipes, follow me on Pinterest and join my email list. Enjoy!
Recipe

2-Ingredient Peanut Butter Fudge (No Bake)
Equipment
- 1 Large Mixing Bowl
- 1 8x8-inch Pan with Parchment Paper
- 1 Rubber Spatula or Knife
Ingredients
- 1 16 oz. jar creamy salted peanut butter see notes*
- 1 16 oz. jar creamy vanilla frosting see notes**
- flaky sea salt optional for topping
Instructions
- Line an 8x8-inch pan with parchment paper, leaving some hanging over the sides of the pan slightly for easy fudge removal later.
- Add the creamy peanut butter to a microwave-safe bowl and heat it in the microwave for 30 seconds. Stir well and microwave for another 15-30 seconds. It will become even creamier and very easy to stir.1 16 oz. jar creamy salted peanut butter
- Remove the peanut butter from the microwave and fold in the vanilla frosting thoroughly until evenly combined. It will thicken the more you stir, but shouldn't be too firm.1 16 oz. jar creamy vanilla frosting
- Transfer the combined peanut butter fudge mixture into the prepared baking pan. Use a rubber spatula or the back of a knife to smooth the fudge into the corners of the pan and create a smooth top.
- If desired, sprinkle sea salt on top of the fudge. Place in the fridge to set up for 2 hours. After chilling, remove the fudge by running a knife around the edges of the pan and lifting the fudge out by the edges of the parchment paper.flaky sea salt
- Slice the fudge into squares and enjoy immediately. Store leftover fudge in an airtight container in the fridge or freeze as desired (see notes).

I love this fudge. It is SOOO good and not too sweet either! Love that it is dietary-friendly since I have gluten-free guests coming to my Christmas party. This is the perfect treat to serve and is insanely easy. I will make this every year. Thanks for the great no-bake recipe!
Hi Jane, I'm so glad you are loving the no-bake peanut butter fudge! It doesn't get easier than two store-bought ingredients like this. Enjoy it this holiday season!
Awesome PB fudge recipe. I will be making it again very soon. Makes a lot too! Perfect for the holiday season as a quick and easy no-bake dessert. Kids loved it and asked for more!
Kelly, thanks for the kind words! I'm so glad you and your family are loving the fudge. I love adding sprinkles on top for an extra festive version for Christmas.
Loved how easy this recipe was to make. Going to add some pb fudge to my cookie boxes this holiday!
This looks delicious and so easy to make!
Phenomenal!! Hands down amazing texture and flavor when made following directions step by step. Used a high quality peanut butter and frosting with an 8x8. Used wider parchment and nested a second 8x8 over it to form the parchment to the pan so when its time to remove and cut, just pull the parchment and the whole block comes out nicely and easily. Thanks for an easy and quick fudge recipe!
It's even better and healthier if you use the sugar free icing!! Yum
Love this fudge. SO easy and better than other complicated fudge recipes. It tastes amazing and I love the simple, easy ingredients. Kids and family loved it for the holiday party!
Might be the best fudge I've made. I love how EASY and QUICK this recipe is. Perfect for last-minute holiday desserts and makes a bunch to share or freeze for later!! Yum!
OMG !! This is the best Recipe yet. I'm so happy with it I'm making another batch tonight. Thanks for sharing this with us. Yum Yum, YUM.