These crushed Oreo red velvet cookies have soft, chewy centers and chunks of Oreos in every bite. Their rich chocolate red velvet flavor pairs perfectly with the sweet and creamy Oreo filling. Best of all, this recipe is easy to make in one bowl and the cookies are ready to eat in 20 minutes.

Red velvet cookies make the perfect dessert for Valentine's Day with their festive deep red color. You can easily make this recipe gluten-free and dairy-free with some simple swaps. No matter what, they taste delicious!
If you love red velvet, you have to give these red velvet cake mix brownies a try sometime, too. You can't beat the flavor!
Jump to:
Why You'll Love These Cookies
- Quick & Easy - You only need one mixing bowl and 20 minutes to make this recipe!
- Oreo Stuffed - The cookie dough is stuffed with crushed Oreos, giving the perfect balance of crunchy and chewy bites throughout the cookies.
- Red Velvet Flavor - Red velvet is a delicious flavor of dark chocolate with some added sweetness and tanginess. The Oreo cookie filling mixed throughout the cookies adds a sweet cream cheese flavor, which takes red velvet to the next level.
- Soft & Chewy - The edges of the cookies are firm enough to hold, but the centers are moist, soft, and chewy for the perfect texture!
Ingredients
These cookies aren't complicated. You probably have most of the ingredients in your pantry already. Below are helpful notes about some of the ingredients to ensure the cookies come out perfectly every time:

- Butter - Use unsalted butter that is slightly softened, but not melted. For dairy-free cookies, use vegan stick butter instead.
- Brown Sugar - This adds moisture and sweetness to the cookies, enhancing the chocolate red velvet flavor.
- Granulated Sugar - Granulated sugar complements the brown sugar to create a well-rounded, perfectly-sweet flavor to the cookies.
- Egg - Egg binds the ingredients together. I have not tested the cookies without egg.
- Vanilla Extract - Use pure vanilla extract for best results.
- Red Food Coloring - Liquid red food coloring is ideal. Different brands will have different pigmentation, so you may have to use less or more to achieve the desired deep red color.
- Flour - All-purpose flour yields great results. For a gluten-free version, use gluten-free all-purpose flour or your favorite gluten-free 1:1 flour blend.
- Cacao Powder - Unsweetened cacao powder gives the cookies their classic chocolate flavor. Dark cocoa powder or dutch-process cocoa also works well.
- Crushed Oreo Cookies - You need about 15 Oreos to make these cookies. Crush them into small bite-sized pieces before mixing them into the cookie dough.
Remember to see the recipe card at the bottom of the post for ingredient quantities.
Step-by-Step Instructions
Below are step-by-step instructions for how to make red velvet oreo cookies:

STEP 1: In a large mixing bowl, use an electric hand mixer to mix the butter, brown sugar, and granulated sugar until light and fluffy (about 1-2 minutes).

STEP 2: Mix in the egg, vanilla extract, and red food coloring until fully combined. If necessary, add more food coloring to achieve a bright red color.
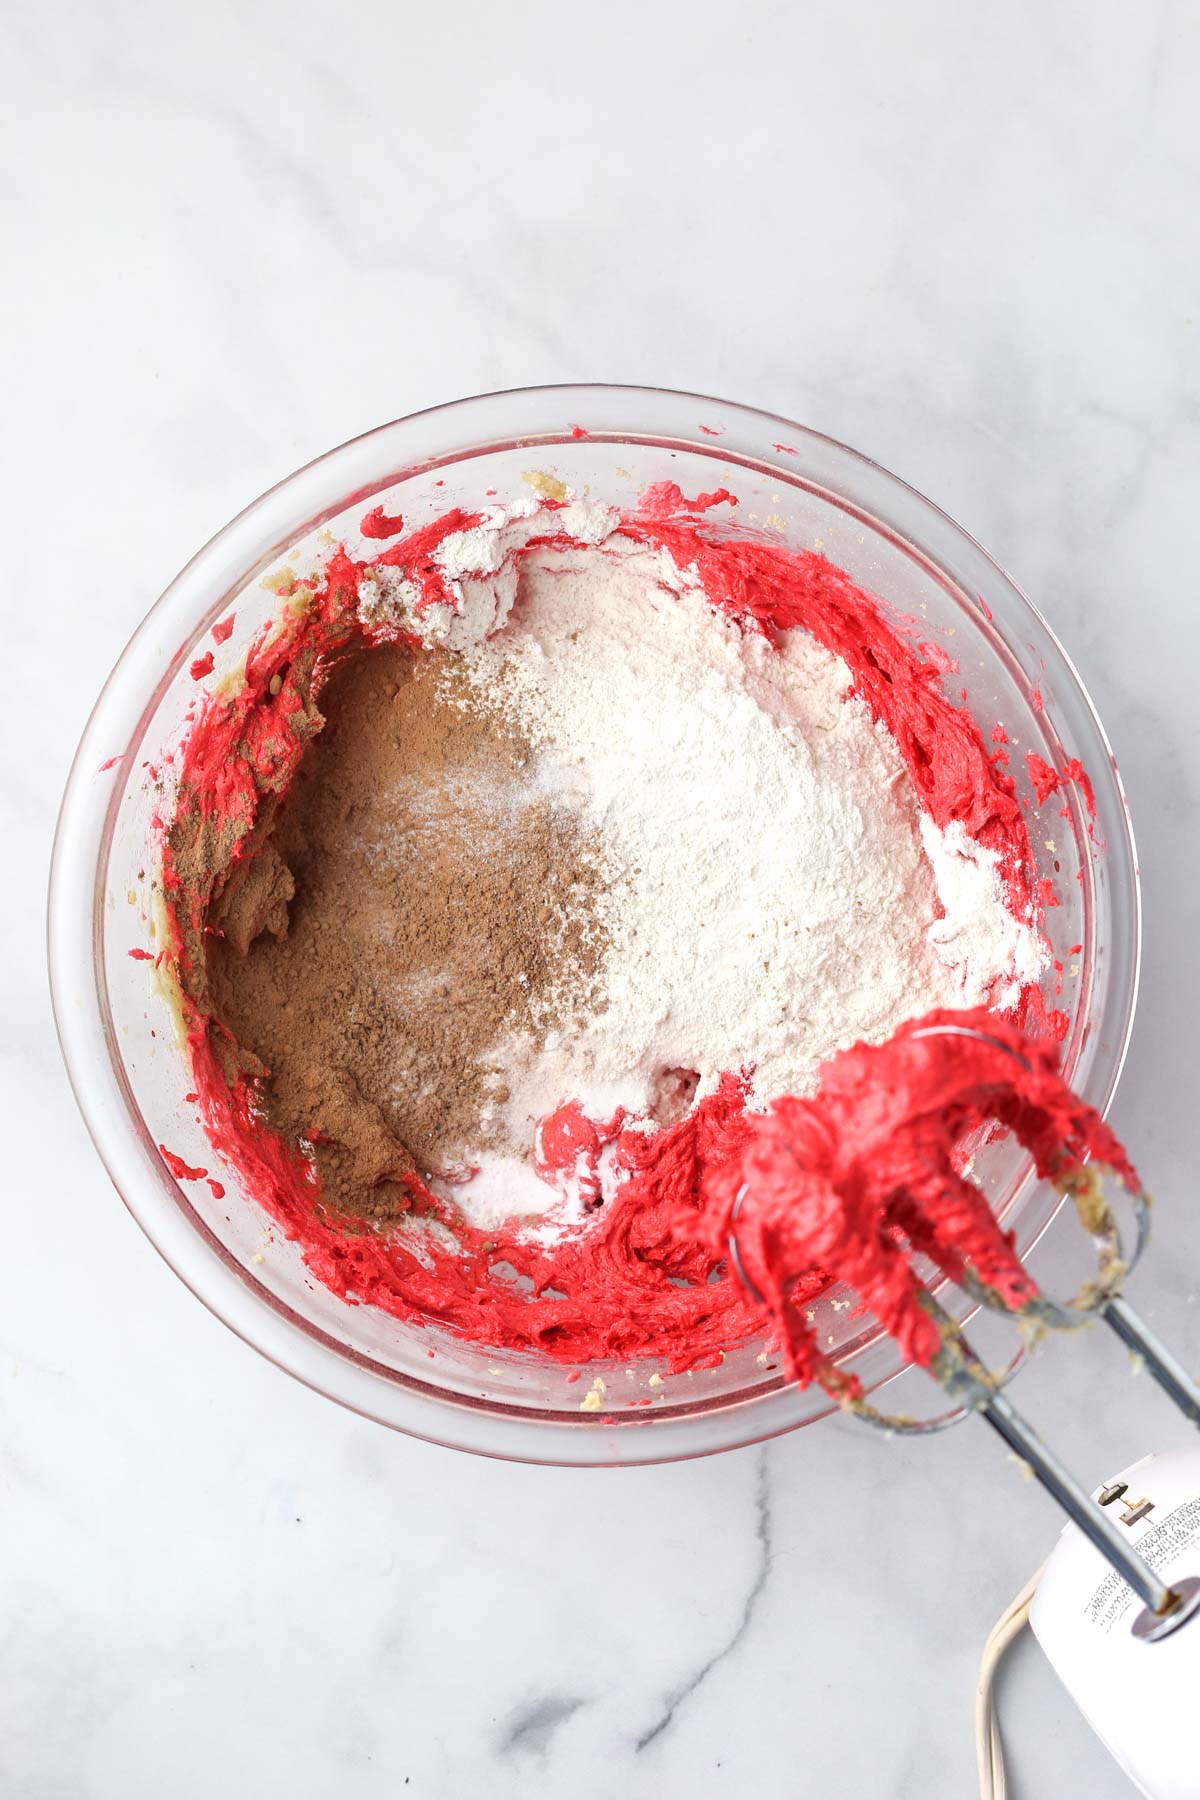
STEP 3: Add the dry ingredients and mix on low speed until just combined. Be careful not to over-mix the dough!

STEP 4: Then, use a rubber spatula to gently fold the crushed Oreos into the cookie dough. Don't overdo it or you'll break up the Oreos too much.

STEP 5: Use a medium cookie scoop to form evenly-sized balls of dough. Place the dough balls on a baking sheet lined with parchment paper. Make sure they are spaced 2-3 inches apart.
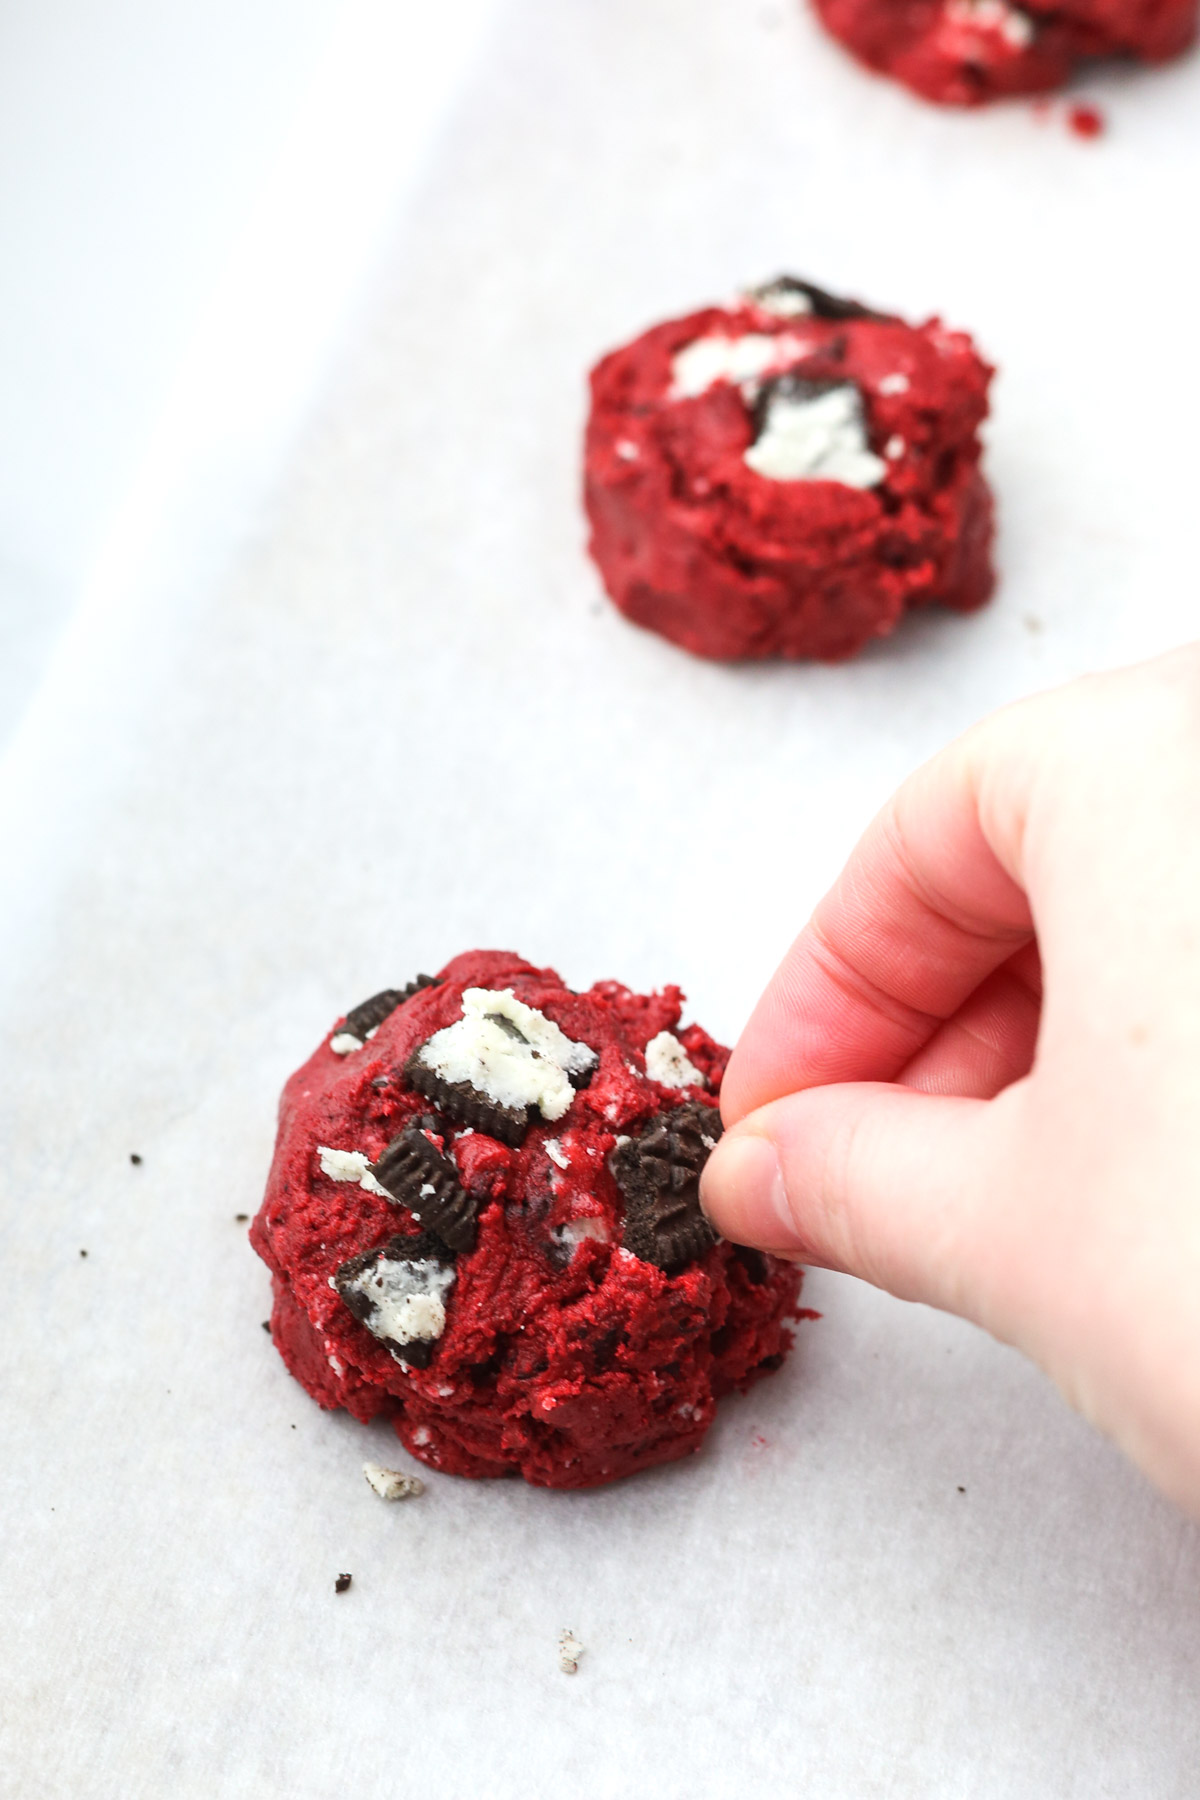
STEP 6: If you want to, press additional chunks of Oreos into the tops of the cookie dough balls before baking. The Oreos will show on the tops of the cookies nicely after baking.
STEP 7: Bake the cookies at 350°F for 8-10 minutes. The edges will appear set, but the centers will be soft and chewy. Remove the cookies from the oven and allow them to cool for at least 5 minutes on the baking sheet to finish setting up.
Then, transfer the cookies to a cooling rack. Enjoy!
TIP: You can crush the Oreo cookies with your hands, or put them in a Ziploc bag and crush them all at once. Either way works well!

Expert Baking Tips
- Properly measure the flour - Don't scoop or pack flour into the measuring cup or you'll end up with dry and thick cookies. To ensure the cookies are soft and chewy, spoon flour into the measuring cup and use a knife to level off the top.
- Fold in the Oreos - Don't use a mixer to add the Oreos. Use a rubber spatula to gently fold them into the dough so they don't get too crushed.
- Don't over bake - Remove the cookies from the oven when the edges appear set. You don't want to bake them too long or you risk drying them out.
- Allow the cookies to cool - Let the cookies cool on the baking sheet for at least five minutes so the centers can set up nicely.
Cookie Variations
- Dairy-Free - Most Oreos are dairy-free and vegan. Use vegan butter and this recipe easily becomes dairy-free. I recommend vegan stick butter, not a spread.
- Gluten-Free - Use Gluten-Free Oreos and replace the flour with gluten-free all-purpose flour (or gluten-free 1:1 flour blend).
- Extra Creamy - Use Double-Stuf Oreos instead of regular Oreos. The creamy filling adds extra sweetness to the cookies.
Try making these homemade vegan oreos sometime. They're so much fun!

Frequently Asked Questions
Red velvet oreo is a delicious flavor combination. Red velvet cookies are typically made with cocoa powder, which gives them a deep, dark chocolate taste. Adding crushed Oreos adds even more chocolate flavor and the Oreo filling provides a delicious and sweet cream cheese-like flavor to the red velvet cookies.
As of 2020, Oreo discontinued their red velvet-flavored cookies to make room for new flavor releases. However, this cookie recipe uses traditional chocolate oreo cookies and pairs them with red velvet cookie dough to create delicious, homemade red velvet oreo cookies.
I use Regular Oreo cookies with great results, but Double-Stuf Oreos and Chocolate Oreos work well too. I would avoid using fruit-flavored Oreos, but most other varieties pair nicely with the red velvet flavor.
No, traditional Oreos are not gluten-free. They contain wheat flour, which is a gluten-containing ingredient. However, Oreo does make Gluten-Free Oreo cookies in Regular and Double-Stuf versions now, which are gluten-free.
Yes! Despite their creamy filling, Oreos are in fact dairy-free and vegan. This cookie recipe easily becomes dairy-free if you use vegan butter.

Storing & Freezing
Store leftover red velvet cookies in an airtight container at room temperature for 5-7 days. This keeps them moist and chewy.
To freeze leftover baked cookies, place them in a freezer-safe, airtight container. They freeze nicely for 2-3 months. Remember to thaw them at room temperature before enjoying them again.
More Chocolate Dessert Recipes


Did you make these easy crushed oreo red velvet cookies? Please leave a star rating and review below. This supports my blog immensely and really helps other readers! If you post a photo of your cookies on Instagram and tag me, I would love to share it. To stay updated with the newest recipes, please join my email list and follow me on Pinterest. Happy baking!
Recipe

Crushed Oreo Red Velvet Cookies
Equipment
- 2 Large Baking Sheets lined with parchment paper
- 1 Large Mixing Bowl
- 1 Electric Hand Mixer (or Stand Mixer)
- 1 Medium Cookie Scoop (about 1.5 tablespoons)
Ingredients
- ½ cup unsalted butter, slightly softened (see notes for DF option)
- ¾ cup light brown sugar lightly packed
- ¼ cup granulated sugar
- 1 large egg
- 2 teaspoons pure vanilla extract
- 1-3 teaspoons liquid red food coloring
- 1 ½ cup all-purpose flour (see notes for GF option)
- 3 tablespoons unsweetened cacao powder or dark cocoa powder
- ½ teaspoon salt
- ½ teaspoon baking soda
- 15 crushed oreo cookies
Instructions
- Preheat the oven to 350°F and line two baking sheets with parchment paper (or spray thoroughly with non-stick cooking spray). Set aside.
- Set aside about 15 oreo cookies and use your hands to crush them into small bite-sized chunks. If easier, you can crush the oreos in a ziploc bag. Set the crushed oreo cookies aside for later.15 crushed oreo cookies
- In a stand mixer or large mixing bowl with an electric hand mixer, mix the slightly softened butter, brown sugar, and granulated sugar together until light and fluffy. This usually takes 1-2 minutes.½ cup unsalted butter, slightly softened, ¾ cup light brown sugar, ¼ cup granulated sugar
- Beat in the egg and vanilla extract until combined. Then, mix in the red food coloring one teaspoon at a time. Depending on your food coloring, you may have to add more to achieve a bright red color.1 large egg, 2 teaspoons pure vanilla extract, 1-3 teaspoons liquid red food coloring
- Add the dry ingredients and mix on low speed until well incorporated. The dough will be quite thick, but do not over-mix!1 ½ cup all-purpose flour, 3 tablespoons unsweetened cacao powder, ½ teaspoon salt, ½ teaspoon baking soda
- Use a rubber spatula to gently fold the crushed oreo cookies into the dough until just combined. Do not mix too much or the oreos will break up too much.15 crushed oreo cookies
- Use a medium cookie scoop (about 1.5 tablespoons) to form evenly-sized balls of cookie dough. Place the dough balls on the baking sheet, leaving 2-3 inches between each ball to allow for spreading.
- Press additional chunks of oreo cookies into the top of the dough balls before baking, if desired.
- Bake the cookies (one sheet at a time) for 8-10 minutes. They will spread and appear firm around the edges. Don't worry if the centers seem under-baked; they will continue to set up on the baking sheet as they cool. It is better to under-bake them slightly so they are soft and chewy.
- Remove the cookies from the oven and allow them to cool on the baking sheet for 5 minutes before transferring them to a cooling rack. Enjoy!

These cookies are so good! I love making red velvet desserts around this time of year, for Valentine's Day especially. The cookies look thick in the pictures but are actually nice and soft and chewy as described. The centers are amazing!! I used Double-Stuf Oreos and vegan butter so they were dairy-free and they came out perfect. I'll definitely be coming back to this recipe every year. Thank you!
Hi Autumn,
Thank you for such kind words about these cookies! I'm thrilled that they came out well for you and that you were able to make them dairy-free with great results. Double-Stuf Oreos sound like a delicious choice! Happy Valentine's Day!
These red velvet cookies are soooo good! I am making them again for a Galentine's party. The crushed Oreos inside are delicious! 10/10!
I recently made your red velvet brownies so I knew I had to make your red velvet cookies too!! Both are amazingggg. Thanks for sharing these recipes. Can't wait to make them again soon 🙂
Hi. These are great! But at the moment I add the cacao powder, they become brown. Maybe the USA has better food coloring stuff than good old Germany 😉
Yours, Paul
Hello, can i make these cookies into crunchy cookies?
Hi Cindy,
Yes! If you prefer crunchy cookies instead of soft and chewy ones, you can bake the cookies a few minutes longer. Just be careful not to burn them. Enjoy the recipe!